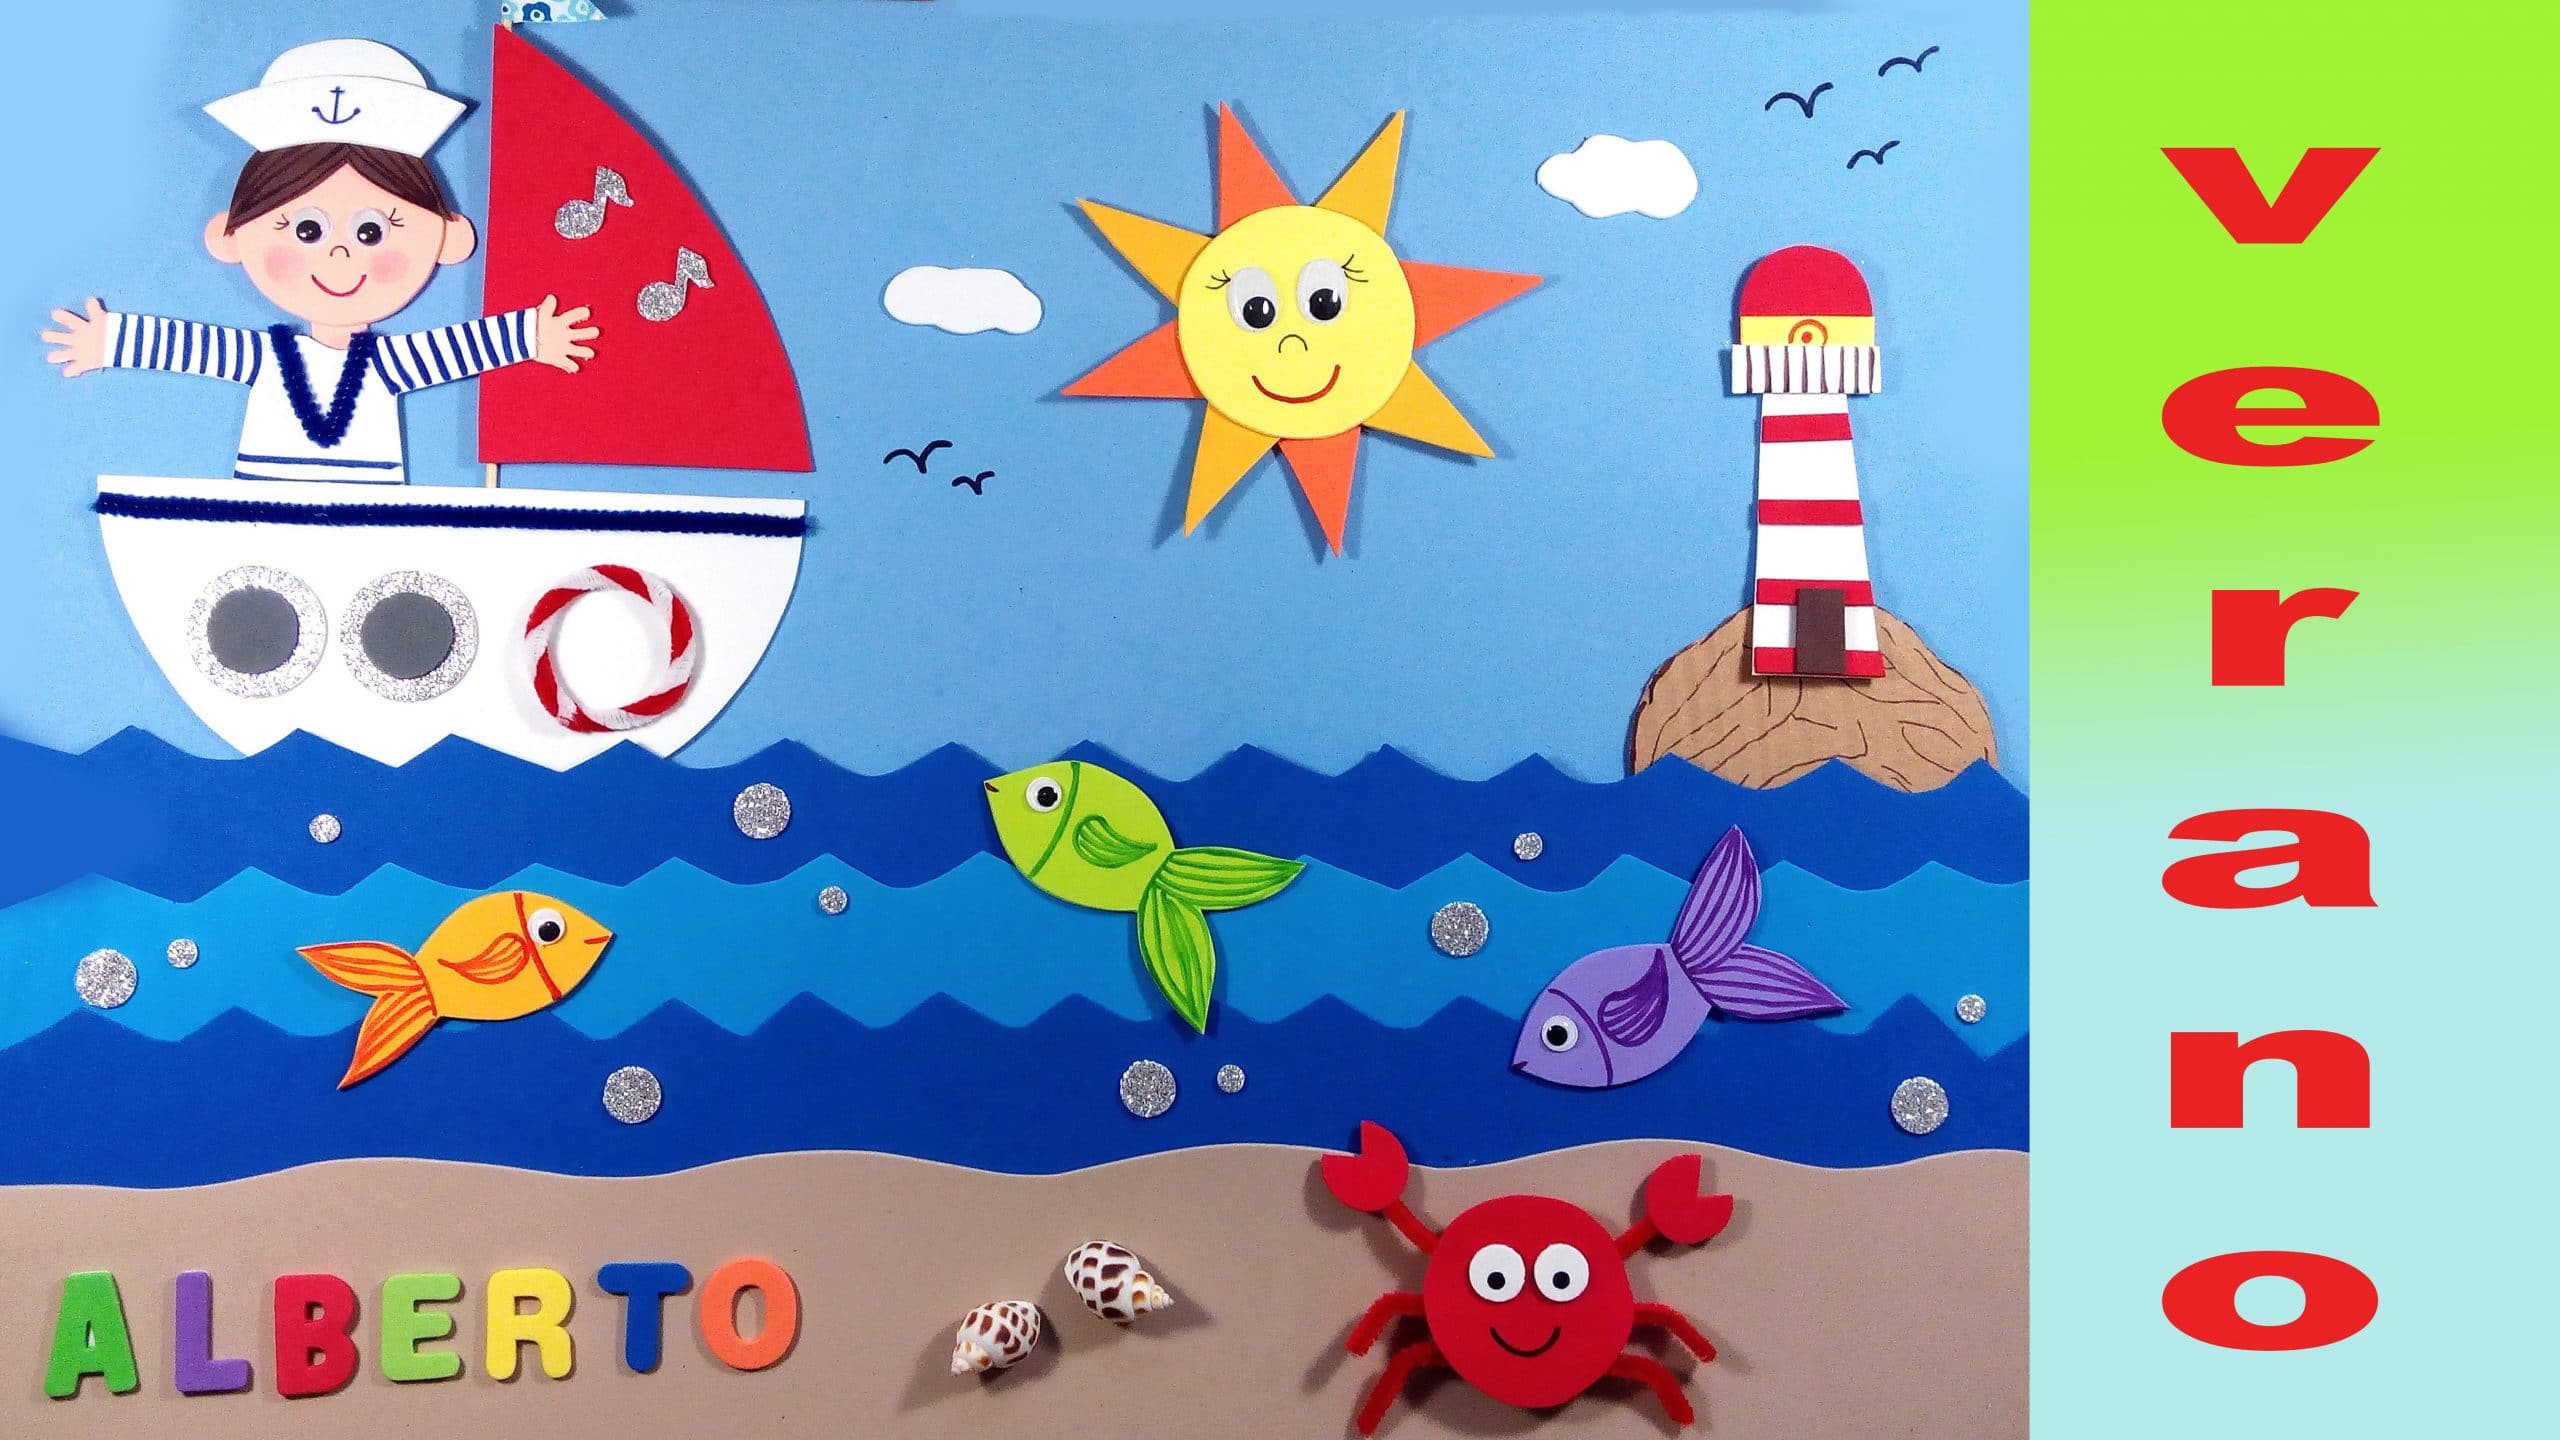
Arrives summer and it's time to go to the beach and enjoy the holidays with the little ones. Since we have a lot of time, we can dedicate it to make crafts at home. In today's post I bring you an idea to do with the little ones; a frame based on the sea and in the summer made with eva rubber and perfect to decorate any children's room.
Materials to make the sailor painting
- Cardboard
- Colored eva rubber
- Glue
- Scissors
- Eva rubber punches
- A plate or circular object
- Pipe cleaner
- Permanent markers
- Skewer sticks
- Decorative tape
- Sea snails or shells
- Rubber letters eva
- Mobile eyes
- Eyeshadow and a cotton swab
Procedure for drawing up the seaworthy table
Below you can see step by step to do this job.
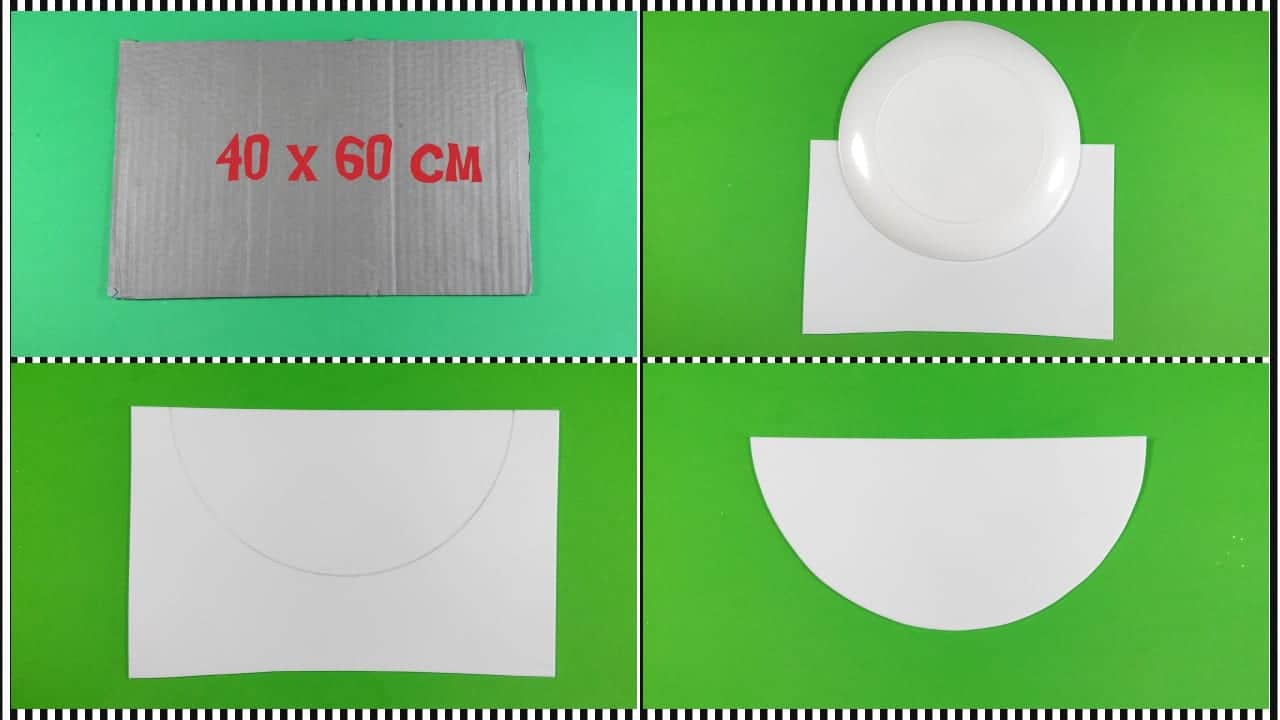
- To get started, you need a cardboard what measure 40x60 inch which will be our base to carry out this project.
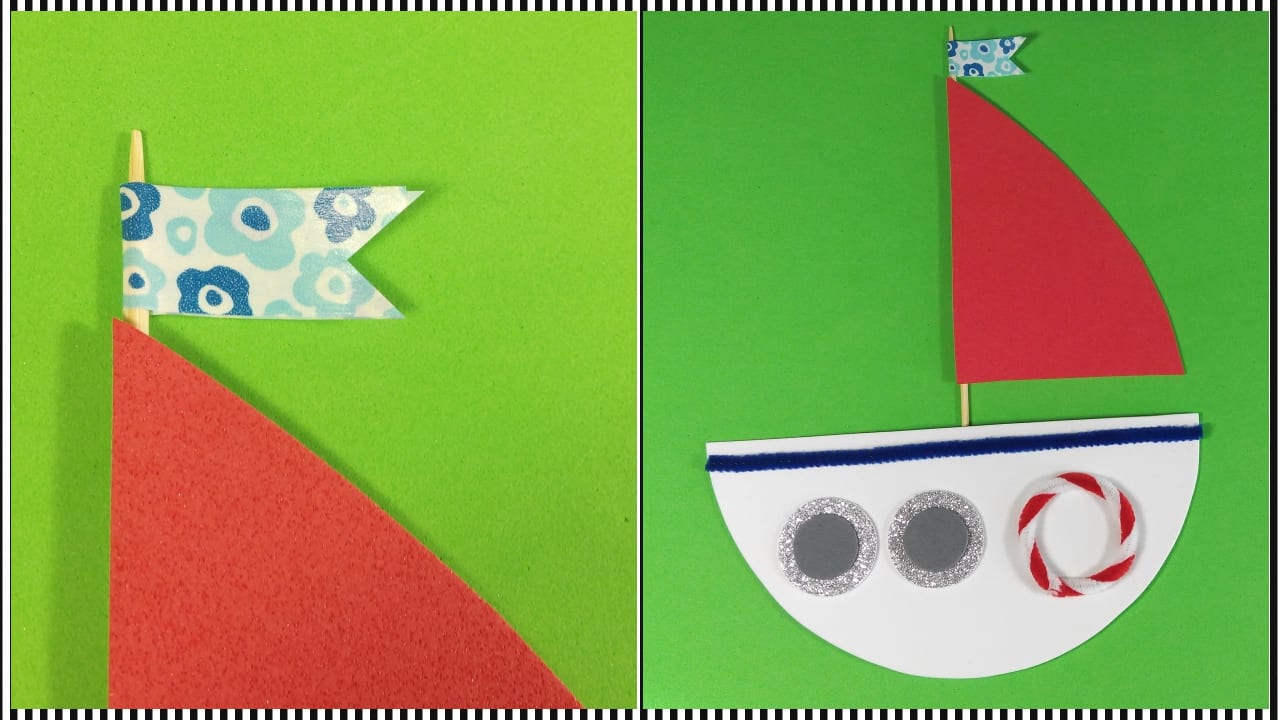
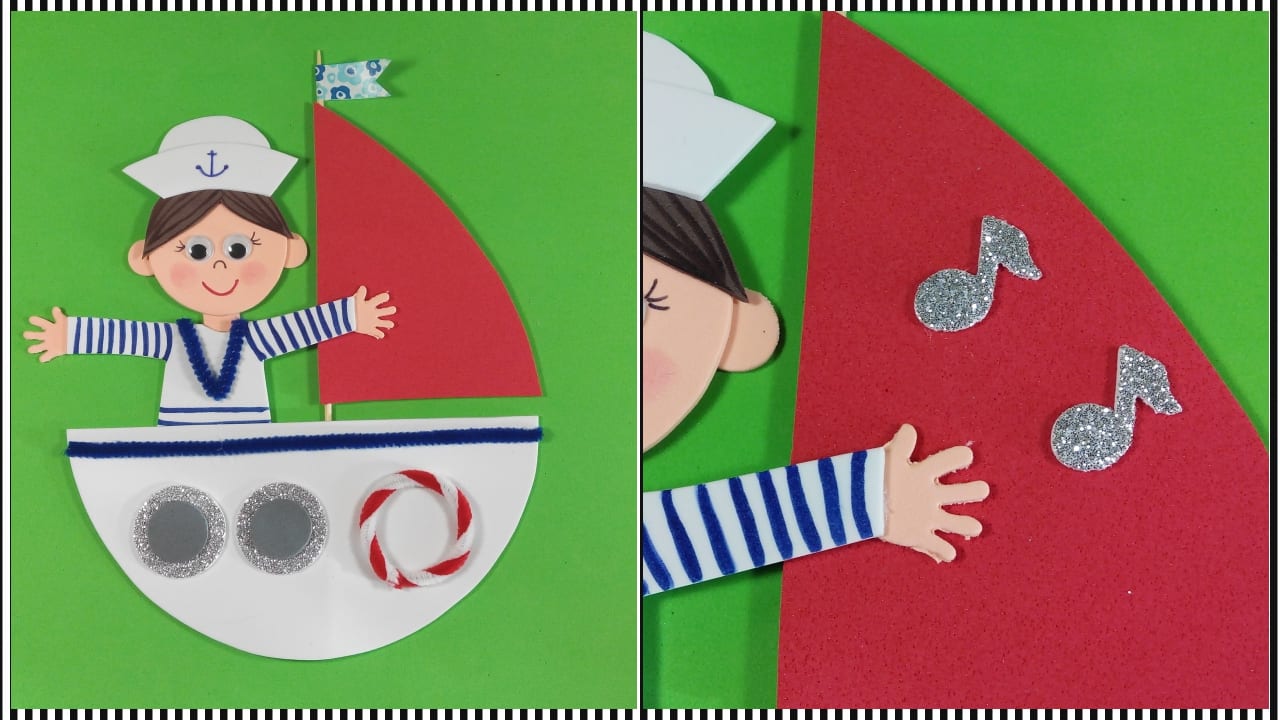
- With a plate they draw on a piece of white eva rubber a semicircle that will be the body of our boat. Cut out that piece.
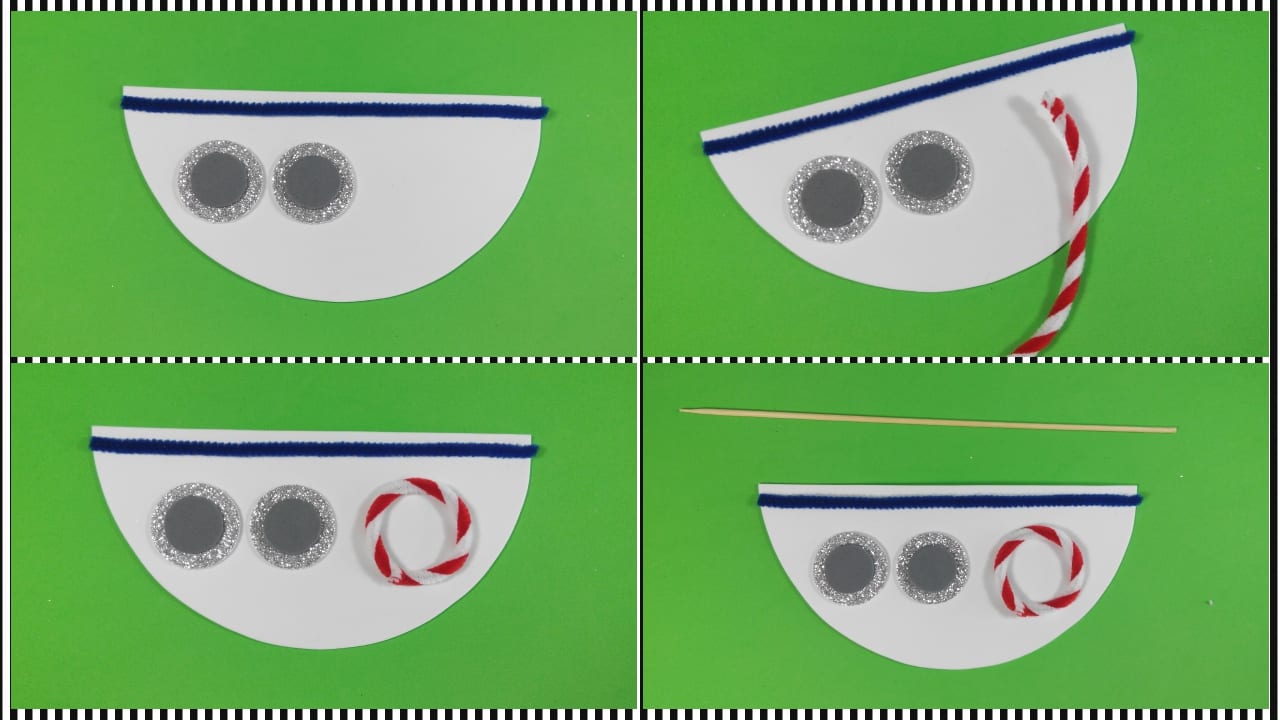
- With the circle perforators I am going to form the portholes to place on the boat, combining silver and gray eva rubber.
- To decorate the boat I am going to use pipe cleaners. I'm going to stick the blue on top and with the red and white I'm going to form the floatr that I will place on the ship.
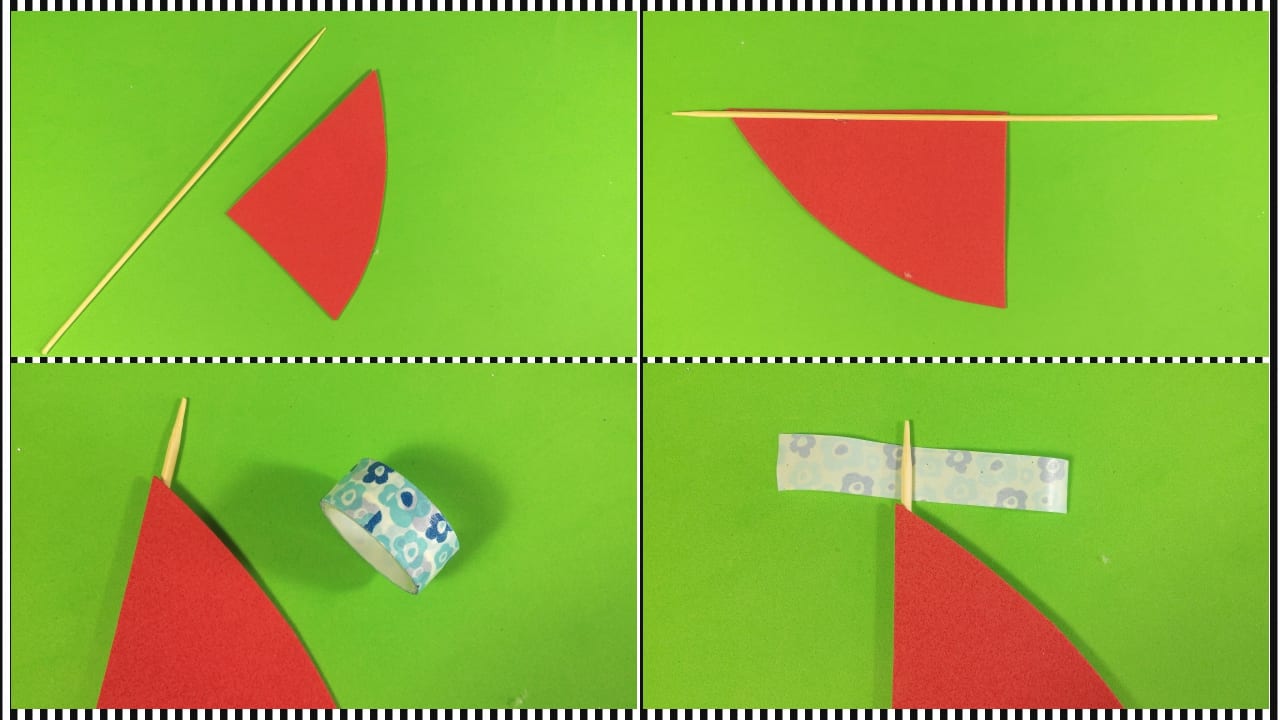
- A skewer stick will be our mast, to which I will glue the sail made of eva rubber.
- The flag It will be decorated ribbon, glue it as in the photo and cut it into a beak shape at the end.
- To finish the boat, I will glue the sail from behind.

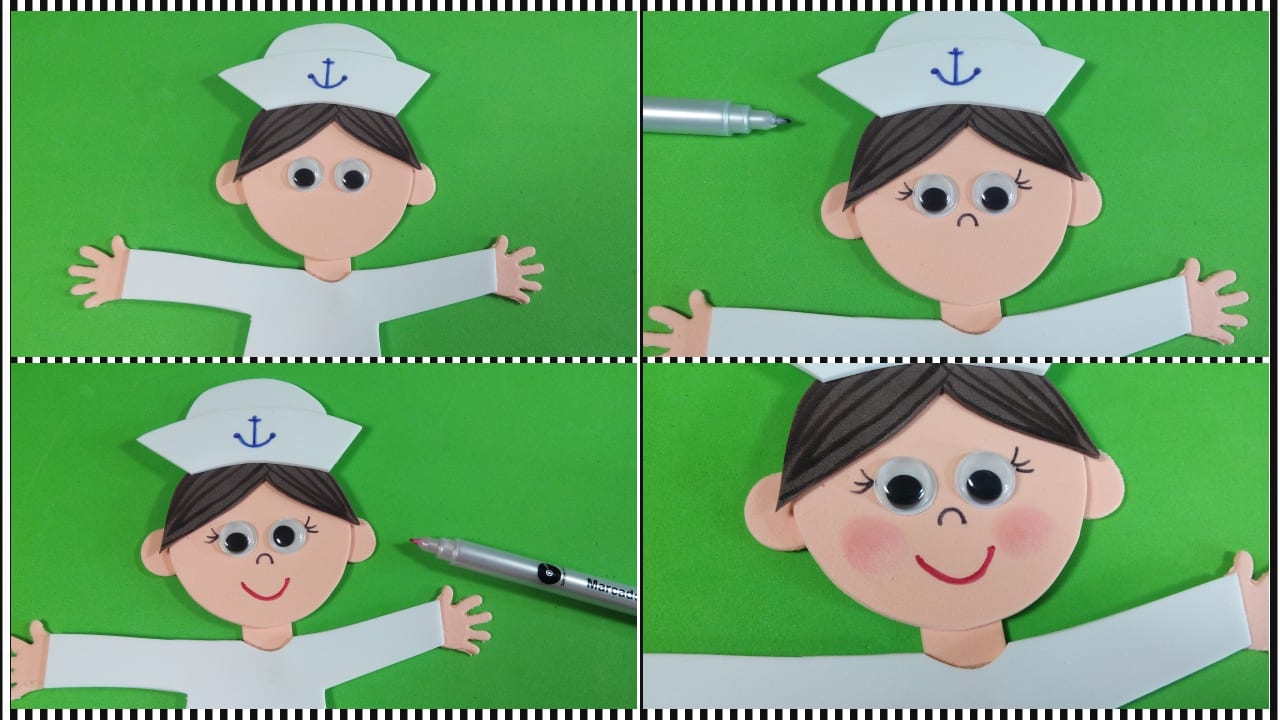
We build our little sailor
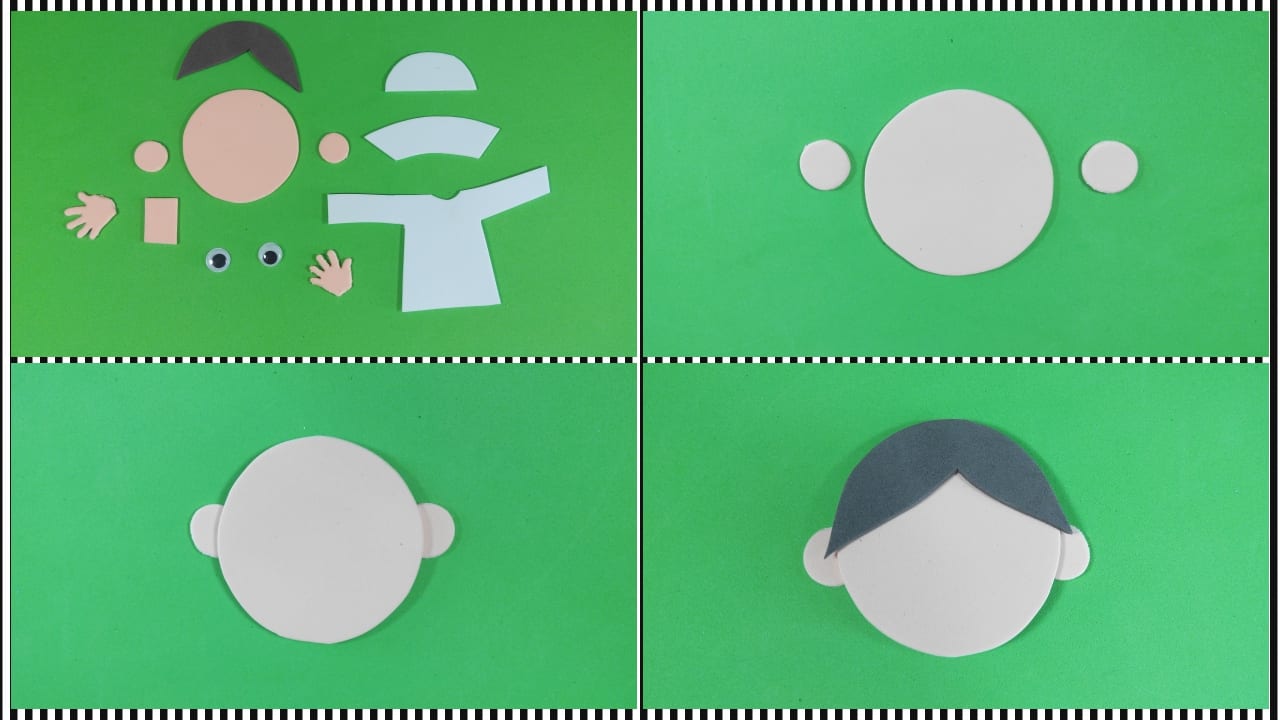
- All these pieces they are necessary to train our character. You can cut them to the size you want to make the doll adapted to your boat.
- I will start by gluing the ears to the face and also the hair.
- With a permanent marker I'm going to make lines in her hair to give her details.
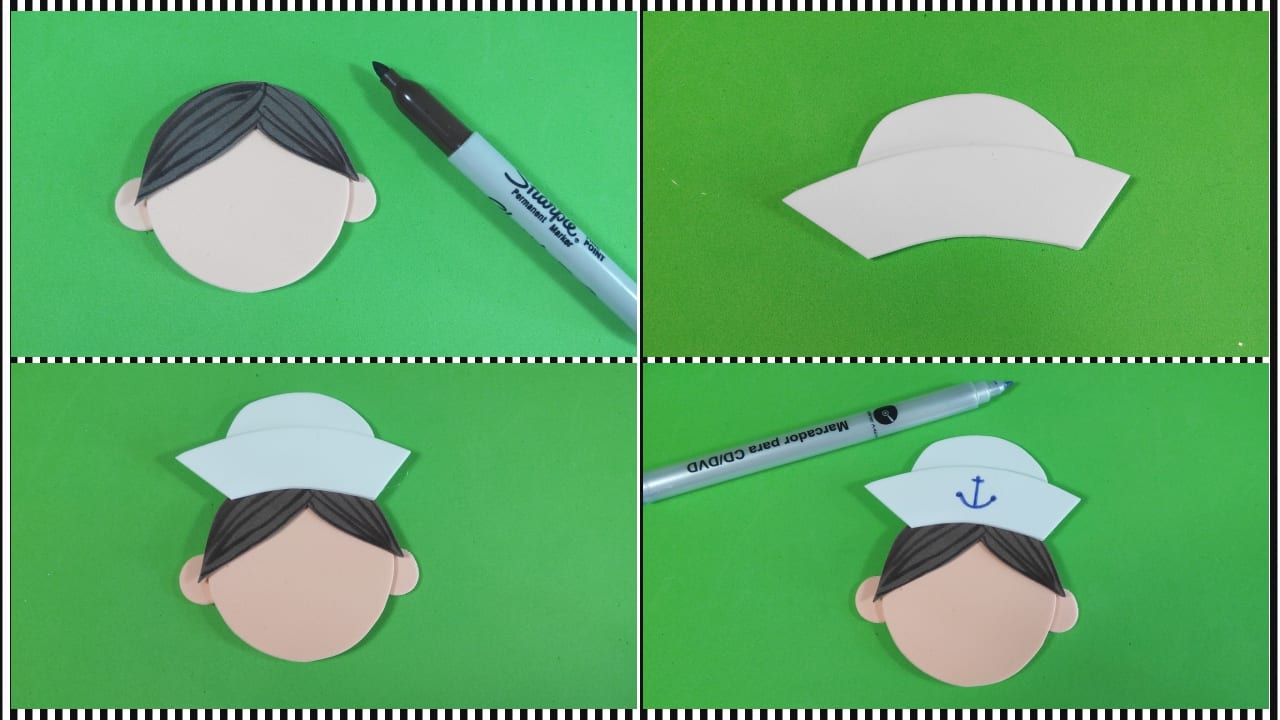
- I will glue the 2 pieces of the sailor's hat and with a fine blue marker I will make an anchor to decorate it.
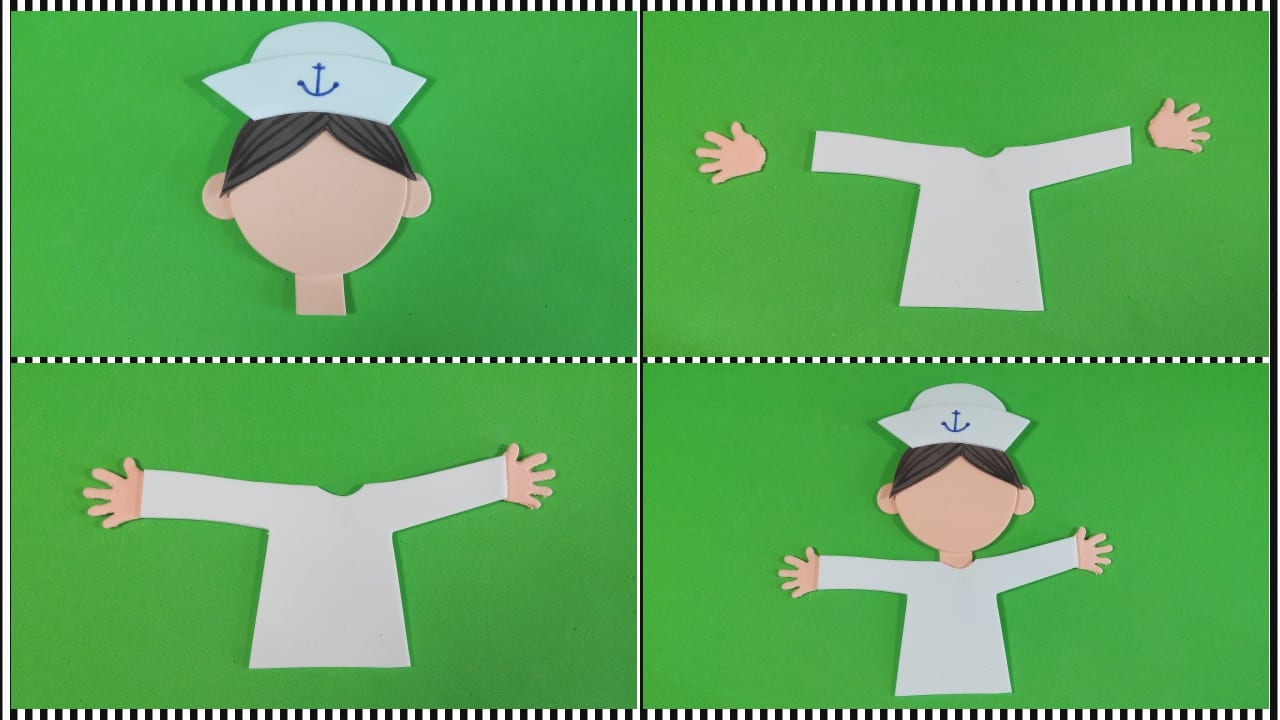
- Next I will glue the neck and the hands to the shirt and all this to the head.
6. We continue to decorate the face. I will paste the eyes mobile phones and I will give you details like eyelashes, nose and mouth with markers. Also a little color on the cheeks with eyeshadow and a cotton swab.
7. With a permanent blue marker I am going to do the typical stripes of a sailor and I'm also going to put a piece of blue pipe cleaner around his neck.
8. It only remains to place it on your boat and decorate the sail as you like, I have used two music notes.

We make other decorative elements
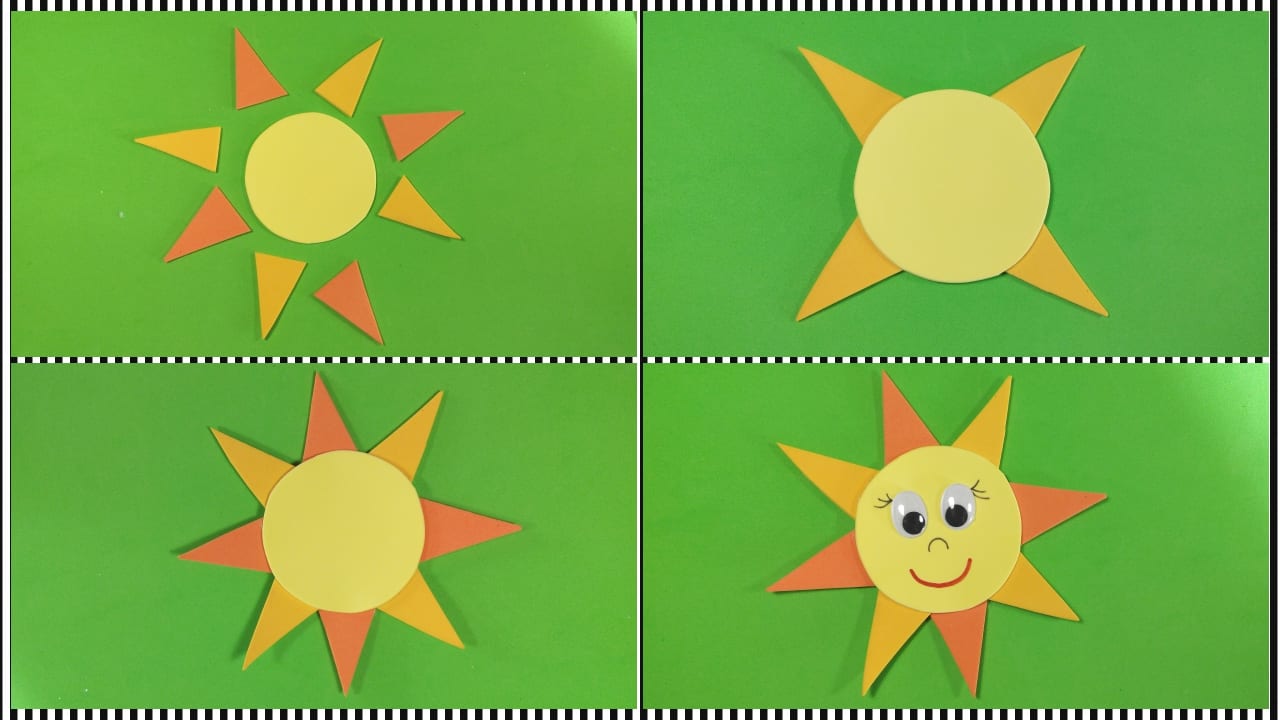
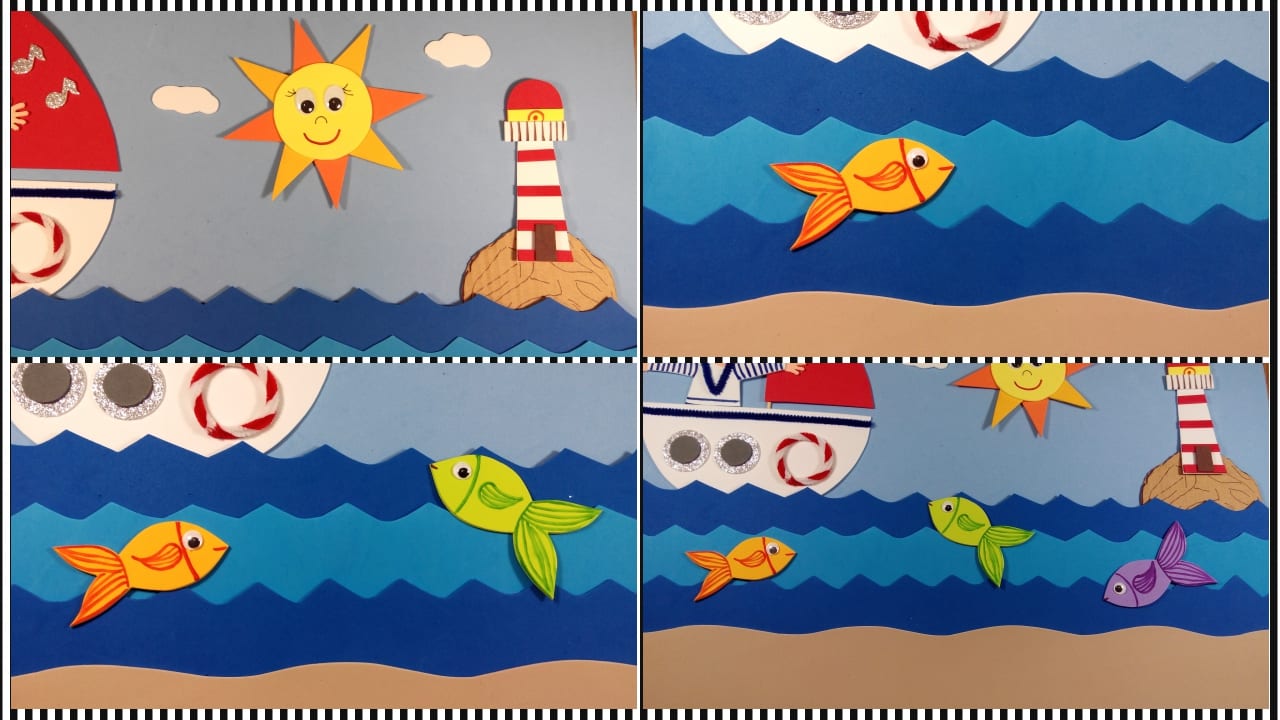
SUN
- Cut out a circle that will be the face of the sun and some orange and yellow triangles to form the rays.
- Go interspersing the colors and glue them from behind.
- Place the eyes, eyelashes and smile and you will have the sun finished.
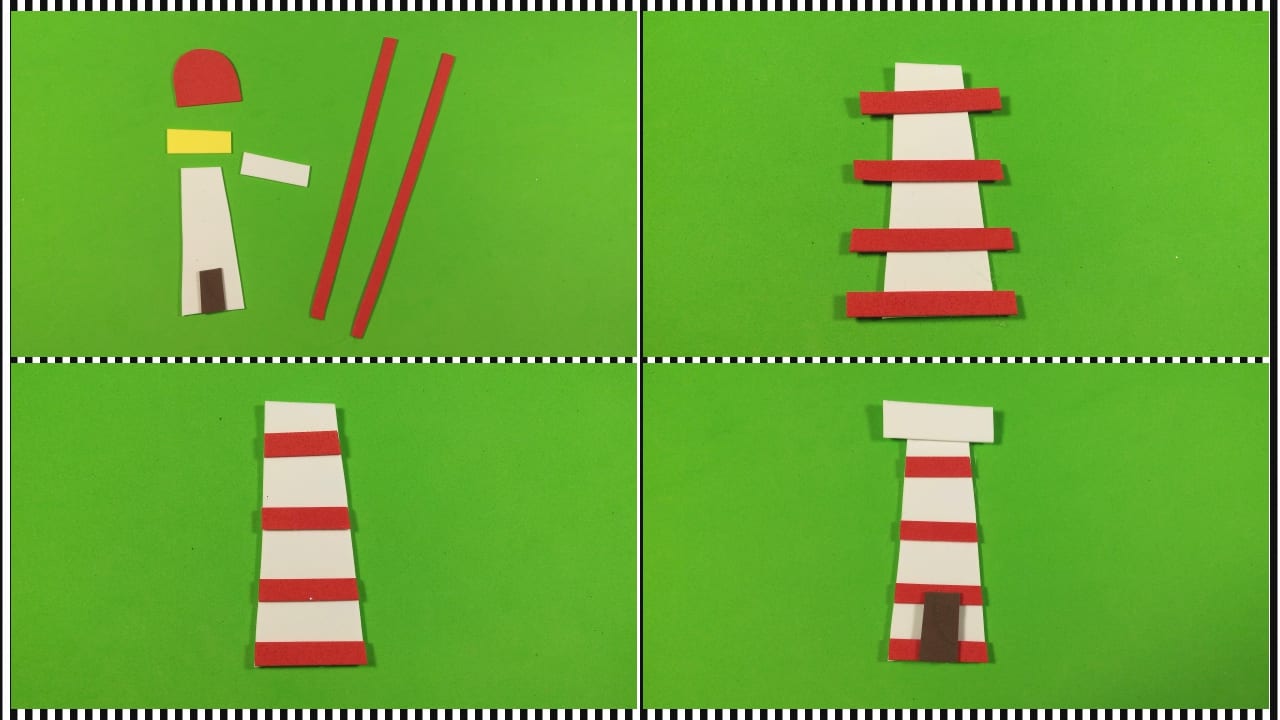
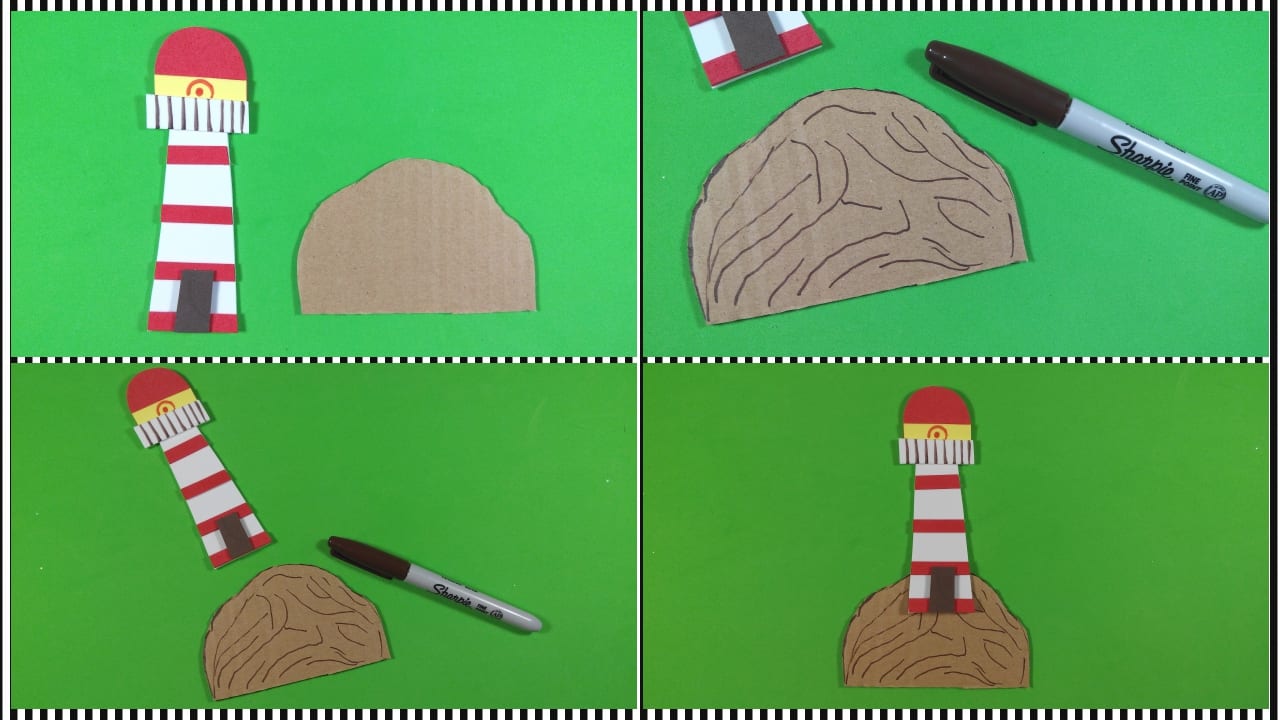
THE LIGHTHOUSE
- Cut out the pieces that you see in the image to make the lighthouse, the size can be varied to your liking.
- Glue each red strip about 2 cm apart. Trim the excess.
- Glue the following pieces together like the balcony, the light, and the lighthouse dome.
- Make the marker pen details of the balcony and the flame with markers.
- A piece of cardboard will be used to make the rock where the lighthouse will go. Make details with the brown marker to make it look like stone and stick the lighthouse on top.

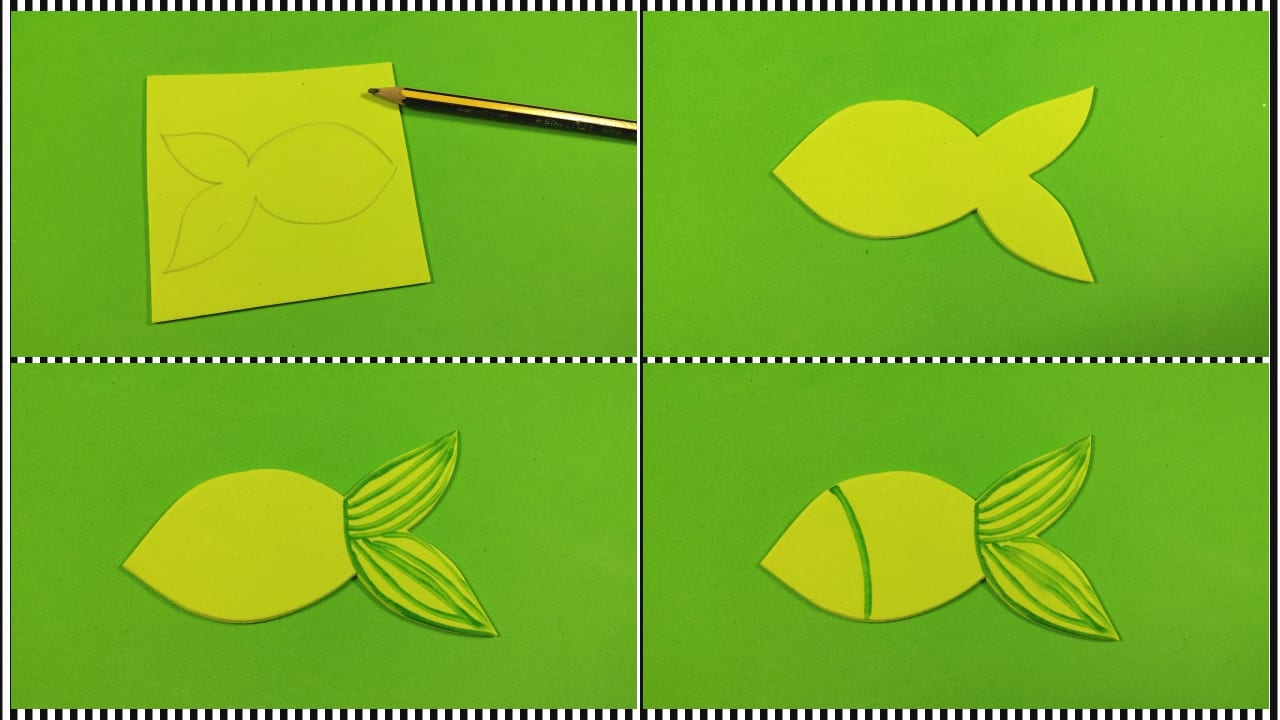
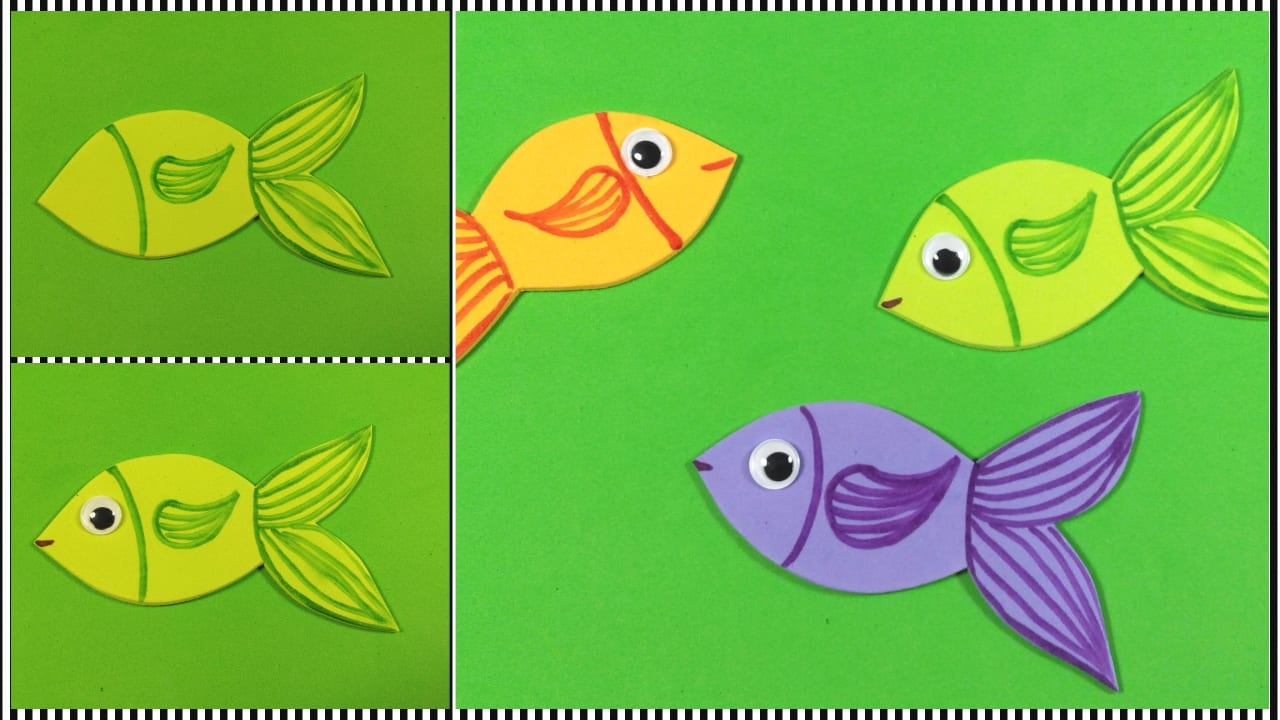
THE LITTLE FISHES
- Draw the silhouette of a very simple fish in various colored foam rubber and cut it out.
- Then, with a marker, make the details such as the tail, the body and the fins.
- Glue an eye and draw the mouth. You will have some very original fish.
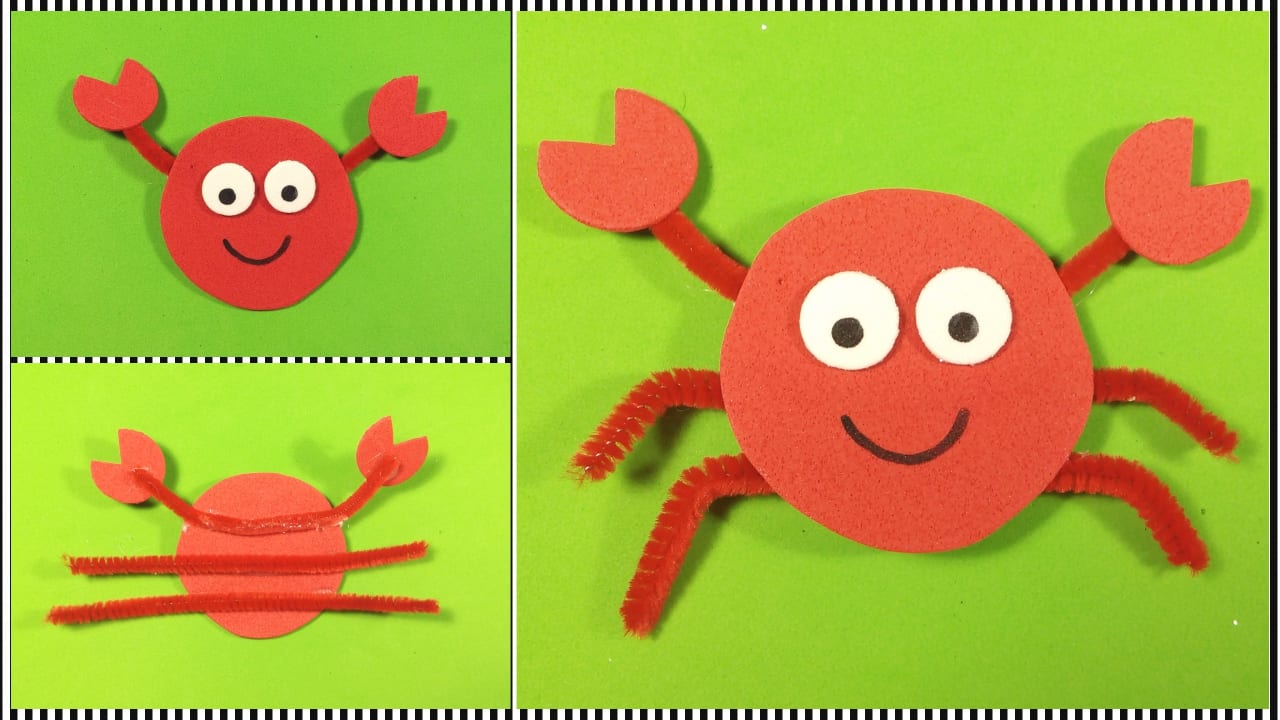
THE CRAB
- Prepare red pipe cleaners and all these pieces are very easy.
- Glue the eyes on the face and on each end of a piece of pipe cleaner the crab claws.
- On the back, glue the other pieces and we will have the legs shaping it with our fingers.

We make the seascape
- Cut out a strip of blue eva rubber that measures 60x25 inch which will be the sky of our landscape.
- Cut out three strips of approximately 6 cm wide and 60 cm long in various shades of blue and makes peaks imitating the waves of the sea.
- Glue the waves alternating colors and to finish the background add the sand of the sea with light brown eva rubber.
- Add the other elements to form this work: the sailor with the boat, the sun, the clouds, the rock and the lighthouse, the fish ...
- To brighten the sea I have made bubbles with silver glitter eva rubber and I have distributed them all over the surface.
- I will continue with the crab, some shells and I am going to make the name "Alberto" with letters of Eva rubber because it is a gift.
- To give it the fine touch I'm going to make some little birds with a black marker.


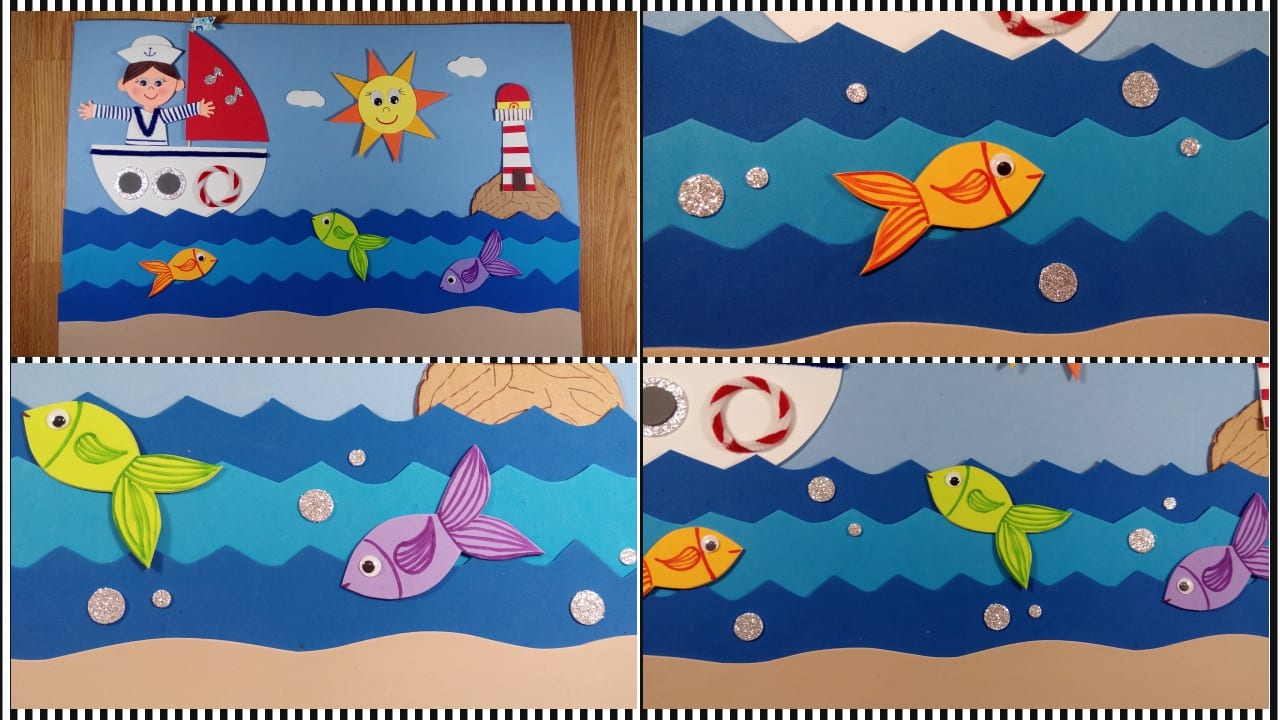


And voila, we have finished this sailor painting, perfect to make a children's gift and decorate the room this holidays. I hope you liked it and if you do, do not forget to send me a photo through any of my social networks.
Bye!!